The Internet is up to its ears in ads. They can overwhelm pages and make it hard to focus on the content. We recently explained how Internet ads work (see part 1 and part 2), and today we are going to explain how to say goodbye to those ads with the help of Kaspersky Internet Security 2017.
Turn Anti-banner on
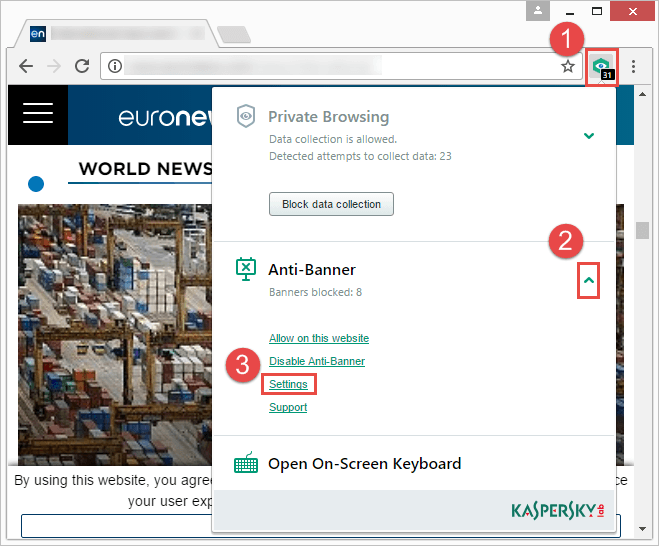
Kaspersky Internet Security 2017 includes a browser extension called Kaspersky Protection, which you can read more about here. Among other things, this extension has a component we call Anti-Banner. To turn it on, click the Kaspersky Protection button on your browser toolbar, and then in the Anti-banner drop-down menu choose Enable.
The other way to turn on Anti-Banner is to open Kaspersky Internet Security 2017’s settings and choose Protection → Anti-Banner.
From now on, you will see fewer ads. Nevertheless, sometimes banners sneak through the filters. If you run into such ads, you can block them:
1. Right-click on the ad and choose “Copy link address” (browsers have different names for this operation, but they look similar).
2. Click on the Kaspersky Protection button in your browser and expand the Anti-Banner menu. In the drop-down list choose Settings.
3. Choose Anti-Banner Settings → Blocked banners → Add. Paste the copied link to add it to the blocked list.
That’s it — you won’t see that banner again.
You can also add sites to allowlist, in which case Anti-Banner will not block any ads on them. You can find more information about Anti-Banner in our Knowledge Base.
 tips
tips


